Making your Changes
Tip
As a general rule of thumb, it's not a good idea to make changes directly to the main branch of a repository. When your working on these SOPs, we require you to create a new branch, that we can then merge into main.

So how do we contribute a new item or section? Let's have a look!
- Fork the project into your personal account on GitHub.
- Create a new branch from
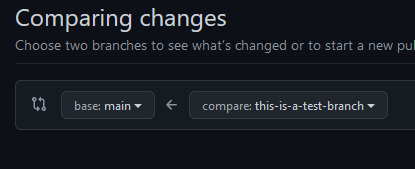
main, with a clear name of what you're implementing - seen in the image on the right. - Checkout your new branch, and commit some changes.
- Open a new Pull Request for your changes/branch.
- This can be done by heading to the sops repository, and finding
Pull requests
- This can be done by heading to the sops repository, and finding
- Click on the green button, saying
New pull request
Make note of the arrow! In the image to the left, you can see that the arrow shows that we're wanting to merge this-is-a-test-branch into main.
- After making sure the arrows are correct, click on the green
Create pull requestbutton.
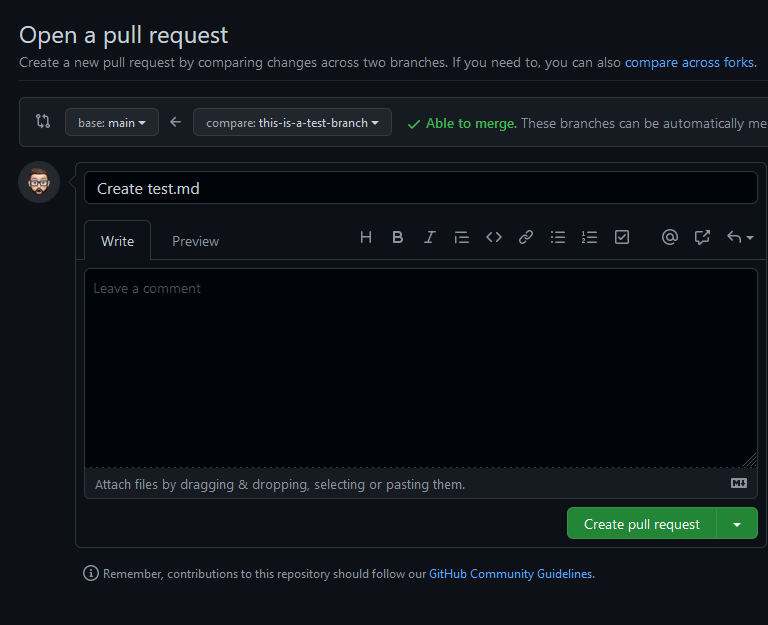
- Make sure your title clearly explains the changes you've made, but is still concise.
- Fill out the main content of your PR as necessary.
The main content of your PR serves as the project tracker for that feature or fix. Feel free to add in checkboxes of important steps, or whatever you need.
Other people are also able to make changes to your branch, and may occasionally have some discussion on your PR.
- Once you're happy, smash the green
Create pull requestbutton!